Using the Upload Photos Tool
Selecting Photos
Press the "Choose Files" button to bring up the file selection dialog. Browse to the photos you want to upload. You can select multiple photos by using the control and/or shift buttons. After finishing, the photos will upload. The overall upload progress will be shown in the bar below the "Choose Files" button. It will always say "No file chosen" even though photos are uploading.
Adding Albums/Tags
You can add all the photos to an album by selecting an album from the dropdown box left of the "Add All Photos to Album" button. After finding the correct album, press the "Add All Photos to Album" button.
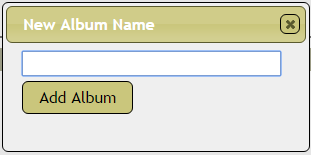
To create a new album, press the "New Album" button. Type in the new name in the dialog box that pops up and press the "Add Album" button. The new album will be added to the end of all of the album dropdown lists on the page.
The "Clear Albums" button clears any and all albums assigned to all photos on the page.
Photos can be assigned individually to albums by clicking in the "Albums/Tags" boxes on each line. Multiple albums can be assigned to each photo.
Viewing the Photo
You can click on the thumbnail image to see a larger version of the photo.
Basic Information
All photos must have a title before being saved.
A date and time does not have to be specified, but if it is, the date/time must be valid. You can click on the calendar button to the right of the field to use a date/time picker.
The description field is optional.
Location
If the photo was geotagged before uploading, the location dropdown will have something chosen. If the location is within 100 meters of a campsite, portage, or entry point, this will be selected. If it is not within 100 meters, the latitude and longitude will be specified. All campsites, portages, and entry points within 500 meters are listed in the dropdown box. Choose the appropriate location.
If the latitude and longitude are correct but the campsite/portage/entry point is not shown in the correct location on the map, please select the appropriate location from the dropdown (campsite, portage, entry point) from the dropdown and send a message to the administrator with the corrected latitude and longitude of the location. You can use the "Contact Us" link found at the bottom of any page to do this.
If the correct location is not found in the dropdown list or the photo was not geotagged, use the "View Map/Other Location" link found below the dropdown box to open a map to help you pick the location. You can also view the location that is currently selected in the dropdown by using this link.
Access
Public access means anybody on the website will be able to view your photo. Private access means only you can see it.
Saving/Deleting Photos
The green checkmark on the right saves the photo. The red X deletes the photo. To save all of the photos on the list, click on the "Save All Photos" button found near the top of the page.
Messages
Messages appear below the "Save All Photos" button. When a photo is saved, the original filename appears next to a green checkmark. Error messages appear next to a red X. To remove an individual message, click on the green checkmark or red X. To clear all messages, click on the "Clear Messages" button.